


Description
Powerful LED emitters for additional position light, that is mounted inside the beams under the windshield on Scania +2016. Available in multiple colors, with and without strobe.
The emitters are available in multiple colors, with and without strobe
Single color, Yellow/White/Warm white
There is 3-meter wire on each emitter, that can be connected to the regular position light. There is a plus and minus wire.
Dual color
There is 3-meter cable on each board. There is one minus and two plus-wires. You should never have both colors turned on, so you need to use a toggle switch to change between the colors.
Dual color + flash
Standard strobe color is yellow, but it can be customized to e.g. blue or white for special purpose vehicles.
There is 6-meter cable on the emitter with M8 connectors, that can be connected to the included controller. The controller manages the two colors, and automatically turn them off when you enable the strobe light. The controller itself has 3-meter wire. The cable has 4 wires:
- Minus - Green cable
- Plus for white position light - White cable
- Plus for yellow position light - Yellow cable
- Plus for strobe light - Brown cable
It is necessary to cut the cables with M8 connectors when mounting, so make sure you make the assembly waterproof, and connect the wires to the correct colors.
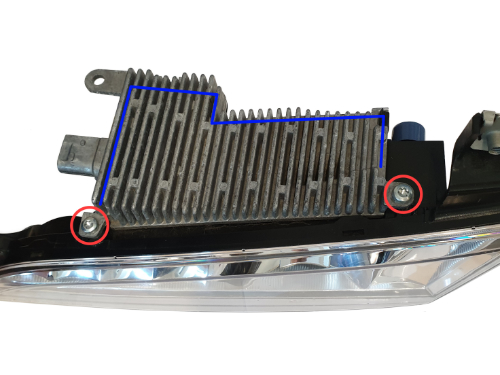
Removal of heatsink
Remove the two screws in the heatsink. Remove the clamps along the edge. It is glued on very well to the lamp. Carefully cut along the edge of the heatsink (blue line). It is very important that the knife edge is not too long, as you risk cutting internal wires.
Åben the lamp using a flat screw driver or wedge.
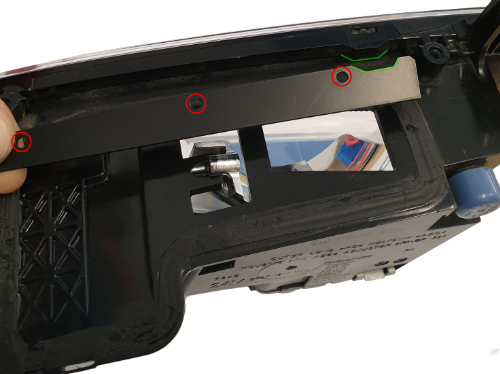
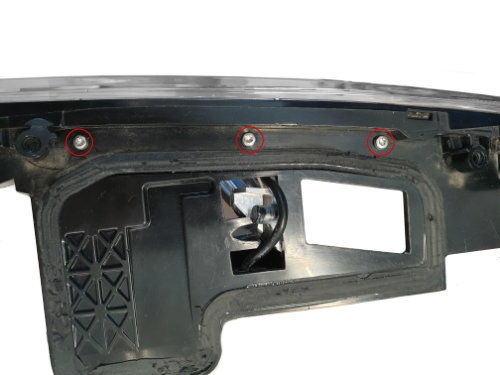
Mountingholes
Use the included drilling template, made of thin plastic (color varies) to drill the 3 x 3mm mounting holes. The template fits over the lamp, where there is a matching cutout (green lines).
Mounting emitter
Be very careful when working with these LED emitters, as the LEDs are very brittle.
The emitter is put in through a hole in the lamp. If you have difficulties getting it in, you can cut off the plastic piece, marked with red lines.
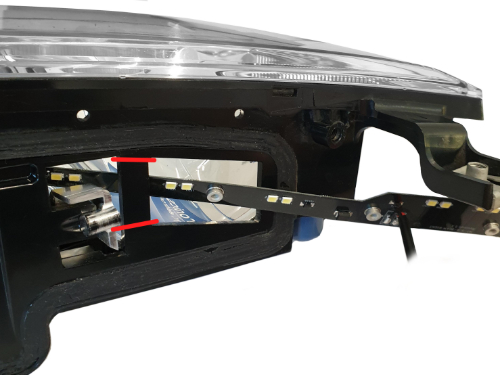
The emitter is fastened through the backside of the lamp, using the included screws.
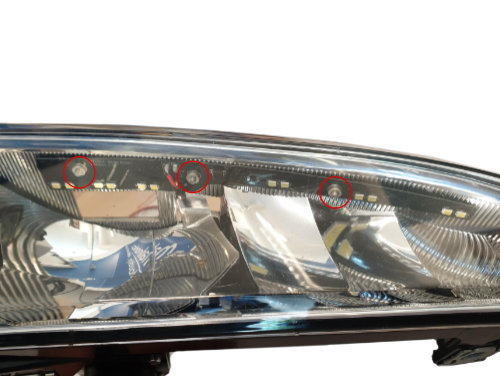
Cable feed through
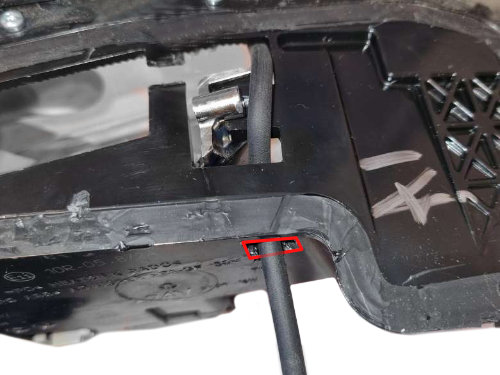
Avoid pulling on the wires on the emitter.
We recommend you drill a hole on the backside of the lamp, for getting the cable out. There is a square indent where you can drill a fitting hole. After the cable is in place, you can fill this indent with glue.
For cables with connectors, you will have to cut the the cable at a suitable place, and assemble the wires again. Take care to connect the correct colors to eachother.
Mounting the heatsink
You must add new glue along the edge of the lamp, same places as the original glue. The heatsink is pushed down and screwed on. If possible, mount the clamps also.